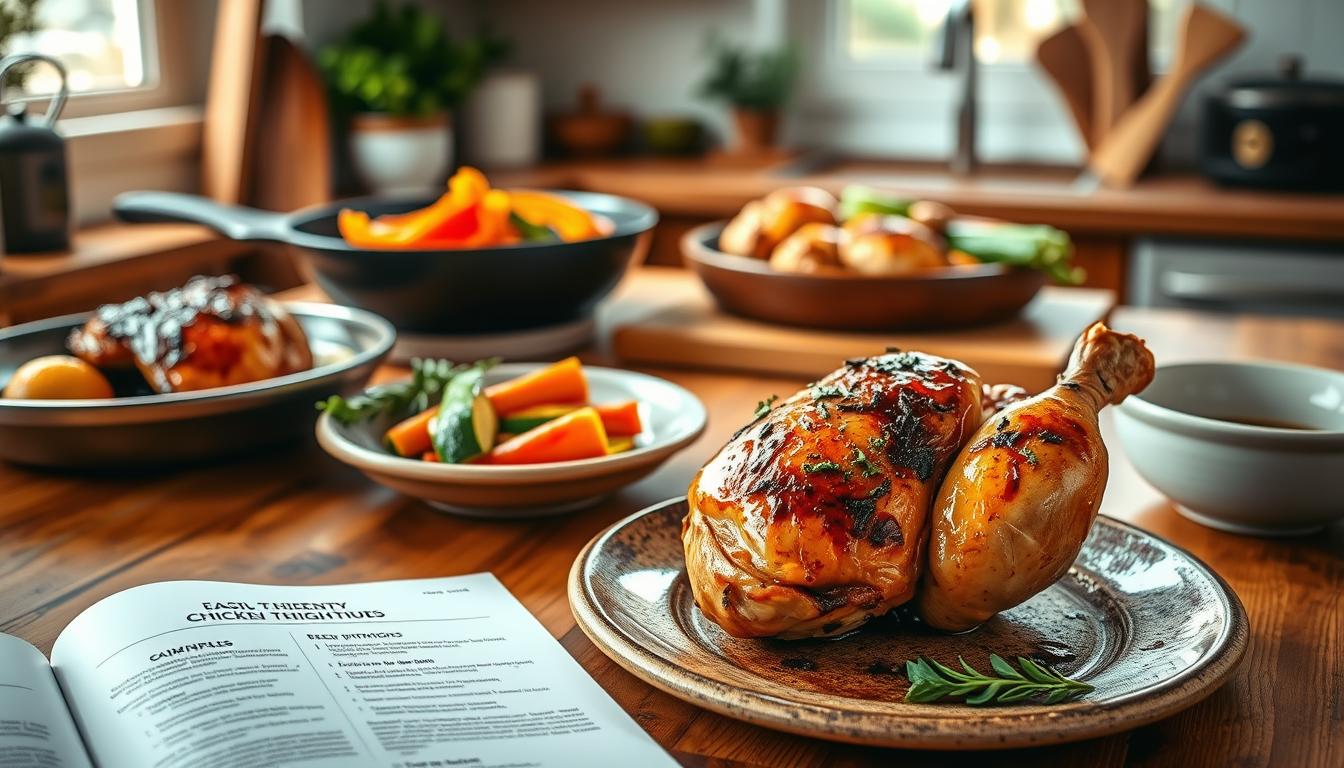
Easy Chicken Thigh Recipes for Beginners (That Actually Work Every Time)
If you’ve ever dried out chicken and wondered what went wrong — this post is for you.
I’ve been cooking chicken thighs almost every week for years, and I’m going to let you in on the secret that changed everything for me: the cut of chicken you choose matters more than the recipe itself.
Chicken thighs are the most beginner-friendly protein you can cook. They’re juicy, flavorful, and nearly impossible to ruin. Once you learn the basics, you’ll have a reliable dinner on the table in under 40 minutes — any night of the week.
Let’s get into it.
Why Chicken Thighs Are Perfect for Beginners
They’re Way More Forgiving Than Chicken Breasts
Here’s the honest truth: chicken breasts punish mistakes. Forget them in the oven for five extra minutes and they turn dry and rubbery. Chicken thighs? They forgive you.
That’s because thighs have a little more fat — just 2 grams more per 100g serving compared to breasts. That small difference is what keeps them moist and juicy even if you’re distracted, multitasking, or still figuring out your oven.
If you’re new to cooking, start with thighs. Every time.
Bone-In vs. Boneless — What’s the Difference?
You’ll see both at the grocery store, and both are great — they just work better in different situations.
Bone-in chicken thighs are ideal for roasting and baking. The bone helps the meat stay moist during longer cook times, and the skin gets deliciously crispy. Use these when you have 40–45 minutes.
Boneless chicken thighs are your weeknight hero. They cook faster, they’re easier to eat, and they work perfectly for pan-searing, stir-fries, and slow cooker meals. Use these when you want dinner on the table in 20–25 minutes.
Before You Cook: Two Prep Steps That Make a Big Difference
1. Pat Your Chicken Dry
This is the one step most beginners skip — and it makes a huge difference.
Before you season your chicken, grab a few paper towels and pat the surface of the meat until it’s dry. Why? Because moisture on the surface of the meat prevents browning. Wet chicken steams instead of searing, and you end up with pale, soft skin instead of that golden, crispy exterior everyone loves.
Dry chicken = crispy, beautiful skin. It takes 10 seconds. Don’t skip it.
2. Thaw Safely
If you’re cooking from frozen, plan ahead and move your chicken to the refrigerator at least 24 hours before cooking. This is the safest method and keeps the texture consistent.
Short on time? Put the frozen chicken in a sealed zip-lock bag and submerge it in a bowl of cold water. Swap the water every 30 minutes until fully thawed. Never thaw chicken on the counter at room temperature — that’s how bacteria grows.
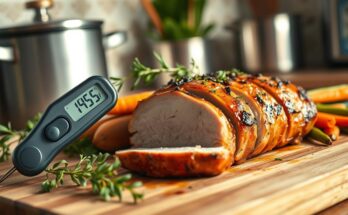
The One Tool Every Beginner Needs
Before we get to the recipes, grab one piece of equipment if you don’t already have it: a digital meat thermometer.
This single tool removes all the guesswork from cooking poultry. Insert it into the thickest part of the meat (away from the bone), and you’ll know exactly when your chicken is done:
- 165°F = safe to eat
- 175°F = perfect for chicken thighs (they stay tender and juicy at this temperature)
No more cutting into the chicken to check if it’s pink. No more overcooking “just to be safe.” A thermometer gives you confidence every single time.
4 Easy Ways to Cook Chicken Thighs
🔥 Method 1: Oven-Baked Sheet Pan Chicken Thighs
Best for: Sunday dinners, meal prep, feeding the whole family Cook time: 35–40 minutes
This is one of the easiest dinners you’ll ever make. Everything goes on one pan — protein and vegetables together — and the oven does all the work.
How to do it:
- Preheat your oven to 425°F.
- Pat your bone-in chicken thighs dry and season generously with salt, pepper, garlic powder, and a drizzle of olive oil.
- Arrange on a sheet pan with your choice of vegetables — carrots, baby potatoes, broccoli, or zucchini all work great.
- Roast for 35–40 minutes until the skin is golden and the internal temperature reads 175°F.
The high temperature is key — it’s what crisps up the skin while keeping the meat juicy inside. One pan, one wash, done.
🍳 Method 2: Stovetop Pan-Seared Chicken Thighs with Garlic Butter
Best for: Quick weeknight dinners, impressive results with minimal effort Cook time: 20–25 minutes
This method gives you restaurant-quality chicken at home. The secret is starting with a cold pan.
How to do it:
- Place boneless chicken thighs skin-side down in a cold skillet, then turn the heat to medium-high.
- Let them cook undisturbed for 8–10 minutes. Starting cold renders the fat slowly, giving you incredibly crispy skin.
- Flip the chicken and reduce heat to medium.
- Add 2 tablespoons of butter and 3 minced garlic cloves to the pan.
- Tilt the pan slightly and use a spoon to baste the chicken with the garlic butter for 2–3 minutes.
- Remove chicken and let it rest for 5 minutes before serving.
Bonus — make a pan sauce: Don’t clean that pan. Pour off the excess fat, toss in a minced shallot, and cook for one minute. Add a splash of chicken broth or white wine and scrape up all those golden brown bits from the bottom. Swirl in a small knob of cold butter and you’ve got a sauce that tastes like it came from a restaurant.
🥣 Method 3: Honey Garlic Slow Cooker Chicken Thighs
Best for: Busy days, meal prep, hands-off cooking Cook time: 6 hours on low / 3.5 hours on high
This one is almost embarrassingly easy. You put everything in the pot in the morning and come home to dinner.
How to do it:
- Place boneless chicken thighs in the slow cooker.
- Mix together: 3 tablespoons soy sauce, 3 tablespoons honey, 4 minced garlic cloves, and 1 teaspoon ginger.
- Pour the sauce over the chicken.
- Cook on low for 6 hours or high for 3.5 hours.
Important: Don’t add too much liquid. Chicken releases its own juices as it cooks, so the sauce will thin out naturally. Start with just the amount listed above.
This chicken shreds beautifully, which makes it ideal for meal prep. Use it in tacos, rice bowls, salads, sandwiches, or pasta throughout the week.
💨 Method 4: Air Fryer Teriyaki Chicken Thighs
Best for: Crispy results fast, minimal cleanup Cook time: 18–20 minutes
If you have an air fryer, chicken thighs are where it truly shines. The circulating hot air removes surface moisture quickly, turning the skin golden and crispy without a drop of deep-frying oil.
How to do it:
- Mix your teriyaki glaze: 3 tablespoons soy sauce, 2 tablespoons honey, 1 teaspoon minced ginger, 1 clove minced garlic.
- Coat boneless chicken thighs in the glaze.
- Air fry at 400°F for 18–20 minutes, flipping once at the halfway mark.
- The sauce will caramelize into a sticky, glossy coating. Serve over rice with sesame seeds.
Pro tip: The air fryer is also the best way to reheat leftover chicken. Four to five minutes at 375°F and it tastes freshly cooked — no sad, soggy microwave situation.
3 Seasoning Ideas to Keep Things Interesting
Once you’ve got the cooking methods down, the fun part is experimenting with flavors. Here are three go-to profiles that work on chicken thighs no matter how you cook them:
🌿 Mediterranean Dried oregano + garlic powder + lemon zest + olive oil. Light, bright, and summery. Squeeze fresh lemon over the top after cooking.
🔥 American BBQ Brown sugar + smoked paprika + cayenne + garlic powder. Apply as a dry rub before cooking. If using the oven or grill, brush on a vinegar-based BBQ sauce in the last 5 minutes — this prevents the sugar from burning while keeping the meat moist.
🥢 Asian Fusion Soy sauce + honey + sesame oil + fresh ginger + garlic. Works as a marinade or a glaze. Add rice vinegar for extra tang, or chili garlic sauce if you like heat.
Common Beginner Mistakes (And How to Fix Them)

“My chicken keeps coming out dry.” You’re using too much heat for too long. Lower your oven temperature and extend the cooking time. Low and slow keeps the moisture in.
“My skin isn’t getting crispy.” You skipped the pat-dry step. Always dry the surface of your chicken before seasoning, and make sure your oven or pan is properly preheated.
“I can’t tell if it’s done.” Invest in a meat thermometer. Color and juice clarity aren’t reliable indicators — your thermometer is. Aim for 175°F for chicken thighs.
“My leftovers taste rubbery the next day.” Add a small splash of broth or water to the container before reheating. Microwave at 50% power, or use your air fryer at 375°F for 4–5 minutes. Always reheat to 165°F throughout.
Storing Leftovers the Right Way
Cooked chicken thighs keep well in the fridge for 3–4 days in an airtight container. Store within 2 hours of cooking to prevent bacterial growth.
For longer storage, freeze in individual portions for up to 3 months. Thaw overnight in the fridge before reheating.
Start Here, Then Make It Your Own
You don’t need a complicated recipe to make a great dinner. You need a good ingredient, a method you’re comfortable with, and a seasoning that sounds good to you.
Chicken thighs give you all the room in the world to experiment. Start with the sheet pan method if you want something simple and hands-off. Try the pan-sear when you want something impressive. Let the slow cooker do the work on a busy day.
The more you cook them, the more confident you’ll feel — and that confidence will carry over into everything else you make in the kitchen.
Pick one method, try it this week, and come back to tell me how it went. You’ve got this. 🙌
Enjoyed this guide? Save it, share it, or pin it for later. And if you have a beginner cooking question, drop it in the comments — I read every single one.